Getting Started
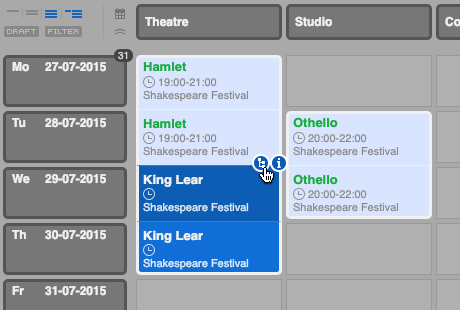
You can open the tree view by hovering the cursor over the event in the event calendar and then clicking the tree icon. The tree view will open, showing the entire event structure that this event belongs to.

To open multiple event structures, you select the different events in the calendar (see Selecting events) and you then you click the tree icon.
You can also open the tree view via the navigation menu (“Events” > “Tree View”). The tree view opens with the trees of all the events that were selected in the calendar. If no events were selected in the calendar, you open the tree view with an empty canvas.
Multiple Trees§
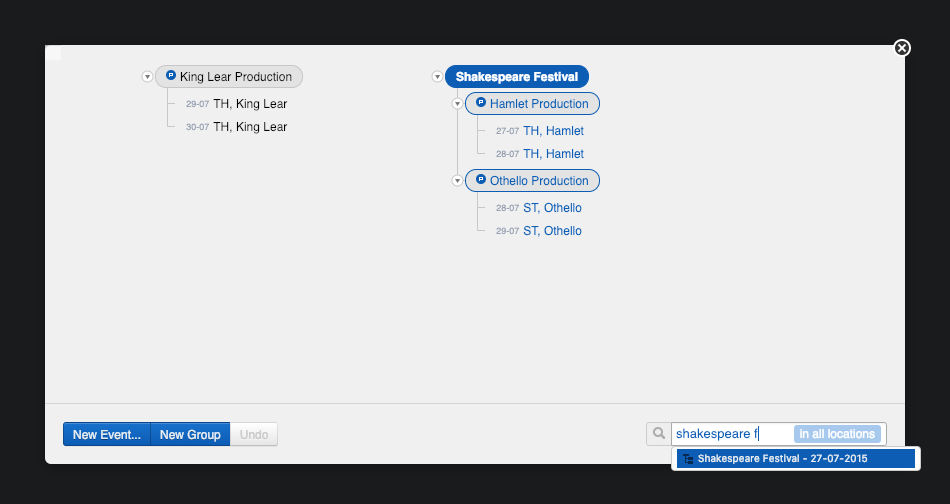
Once the tree view is opened, you can create new events and event groups and compose the latter. You can also add existing event structures to the canvas by searching for an event (or event group) in the search field at the bottom.

Attention
The search field searches for events and event groups of maximum one year old, counting from today or from the current working date if it’s earlier.
The search field also has a filter with the options “in my locations” and “in all locations”. If the filter is set to “in all locations”, you will see all events and event groups. However, if the filter is set to “in my locations”, only the events and event groups appear that take place in the locations that are displayed in your current event calendar view. All other events won’t appear in the suggestion list of the search field.
Large Trees§
When opening the tree view, Yesplan tries to display the entire event structure with all events and event groups. However, this will quickly become a cluttered event structure with lots of events and it won’t fit on the screen anymore. For that reason, large trees are summarized automatically. For a series of events with the same name, only the first and last event will appear, with a button in between that mentions how many events are hidden. When you click this button, you will make hidden events visible.
You can make a tree more compact again via the action “Summarize” in the context menu (the menu that opens when right-clicking). Selected events will still be visible when summarizing. If you perform the action “Summarize” on the top event group, you will make the tree as compact as possible.
You can also expand or collapse complete event groups by clicking the arrow to the left of the group name.
Every tree that is larger than the window can be scrolled vertically. When scrolling, events at the top and the bottom disappear from the screen. However, event groups will be displayed at the top for as long as possible. They stick at the top until no more events from their branch of the tree are displayed. That way you continue to see the context of the displayed events while scrolling. Selected events also stick at the top when scrolling and thus don’t disappear from view.
Other Tree Views§
A tree structure of the event groups also appears in other places, but in those views you can only set productions:
- You also see a tree structure in the event popover. You open this popover by hovering over an event in the event calendar and then hovering over the magnifying glass icon that appears.
- You also see a tree structure in the event inspector, at the left. You open the event inspector by hovering over an event in the event calendar and then clicking the magnifying glass icon that appears. You can also open this inspector by double-clicking the empty space of the event cell in the event calendar.
Productions always have a blue production icon next to their name (a blue circle with the letter P) in tree structures, including the tree view.