Events
Events play a central role in Yesplan. Below is an overview of the configuration options for events in the system settings.
Custom Data§
Inspector Tabs§
Statuses§
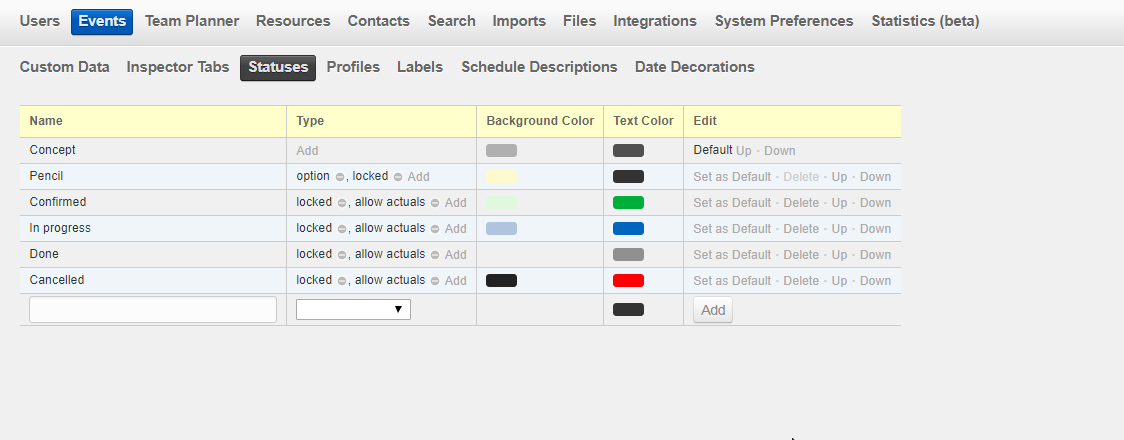
You can manage event statuses in “System Settings” > “Events” > “Statuses”.
Tip
See Status and Profile for a definition of statuses.

This screen displays a list of statuses that are used in Yesplan. Create a new status by filling out the fields in the last row of the table and clicking “Add”.
You can set the following fields for each status:
-
Name: The name of the status (name of your choice). You can edit this name by double-clicking it.
-
Type: Types are optional. They assign a specific meaning to a status, and a status can have one or more types.
Here are the different types in Yesplan:
-
Option: This type influences the way that events, which are booked on the same day and the same location, appear in the calendar. Events that have a status of type “Option” are numbered and sorted in the calendar so that you know which option was added to the calendar first.
The sorting order of events with status type “Option” is determined based on the moment when the event is created OR based on the moment when the event is booked in the location. You can set this in the System Preferences.
-
Allow Actuals: You can add actual numbers and actual times for bookings to events with this status. For example, you can enable subsequent costing or add actual hours for human resources.
-
Locked: A status of this type ensures that the date, location, name of the event and name of the event group can’t be edited randomly, and that the event can’t be deleted. You typically want to use this for events that are confirmed. This setting causes a gray padlock to appear on these events.
There is a capability that allows events with a status of type “Locked” to be unlocked temporarily. Users with this capability can alter the name, location or date of these events by clicking the padlock. These users can also delete the event after unlocking it, if they were granted permission to do so.
Event groups that contain one or more events with the status “Locked” are also protected. As a consequence, you can’t delete a group that contains one or more locked events entirely. However, you can just move or delete the events that aren’t locked within such a group.
-
-
Background Color: Determines the background color of cells in the calendar for events with this status. Click the color to change it.
-
Text Color: Determines the text color of the event’s name in the calendar for events with this status. Click the color to edit it.
These actions are also available:
-
Set as Default: This is the status that is automatically awarded to new events.
-
Delete: You can only delete a status if two conditions are met:
- You don’t use the status anywhere as a condition for determining the visibility of custom data.
- The status is not the default status.
You can’t click “Delete”? Then hover your cursor over it and Yesplan shows you in a tooltip what you need to change to delete the status.
-
Up/Down: Use these to set the order of the statuses.
Remark
The order of statuses is important when awarding permissions on those statuses. See Use of statuses in the manual on managing permissions in Yesplan.
Profiles§
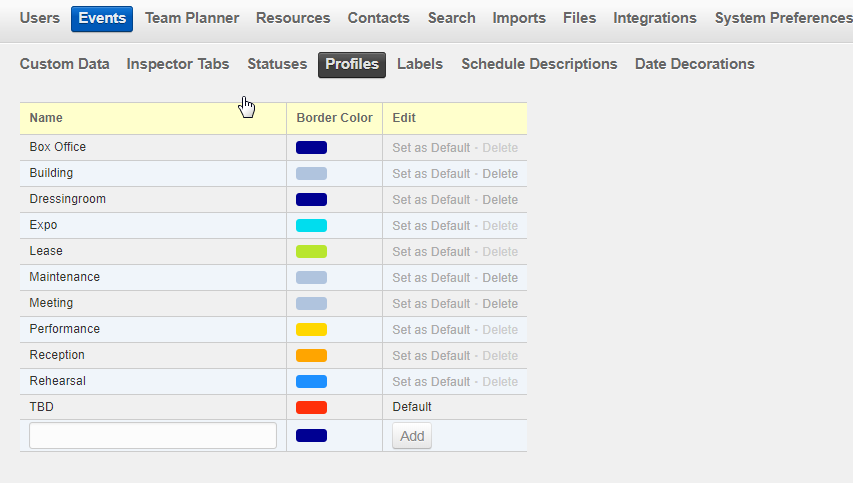
You can manage event profiles in “System Settings” > “Events” > “Profiles”.
Tip
See Status and Profile for a definition of profiles.

This screen displays an alphabetically ordered list of profiles that are used in Yesplan. Create a new profile by filling out the fields in the last row of the table and clicking “Add”.
You can set the following fields for each profile:
-
Name: The name of the profile (name of your choice). You can edit this name by double-clicking it.
-
Border Color: Determines the border color of cells in the calendar for events that are assigned this profile. Click the color to change it.
These actions are also available:
-
Set as default for new users: This profile is awarded automatically to new events for new users. They can change this themselves: see Assigning a Profile and Status for more information.
-
Delete: You can only delete a profile if two conditions are met:
- You don’t use the profile anywhere as a condition for determining the visibility of custom data.
- The profile is not the default profile.
You can’t click “Delete”? Then hover your cursor over it and Yesplan shows you in a tooltip what you need to change to delete the profile.
Labels§
Time Schedule Descriptions§
Date Decorations§
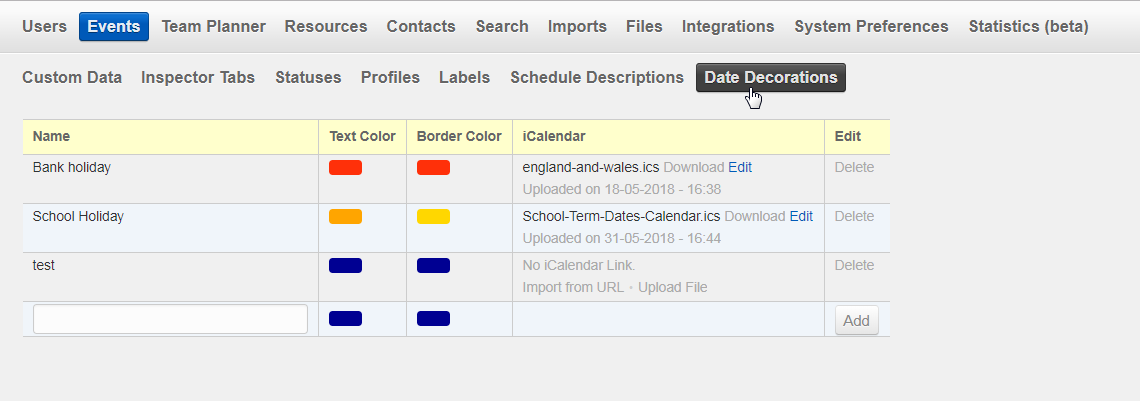
You can manage date decorations in “System Settings” > “Events” > “Date Decorations”.
Tip
See the Event Calendar for more information on the use of date decorations.

This screen displays an alphabetically ordered list of date decorations that are set in Yesplan. Create a new date decoration by filling out the fields in the last row of the table and clicking “Add”.
Remark
You must sign out of Yesplan and sign back in before date decoration changes are visible in the calendar.
You can set the following fields for every date decoration:
-
Name: The name of the date decoration (name of your choice). You can edit this name by double-clicking it.
-
Text Color: Determines the text color of a date with this date decoration in the calendar. Click the color to change it.
-
Border Color: Determines the border color of a date with this date decoration in the calendar. Click the color to change it.
-
iCalendar: In addition to manually setting a date decoration, date by date, it’s also possible to link a date decoration to an iCalendar file. That way, all the dates in the future that appear in the iCalendar file are automatically assigned this date decoration in Yesplan. This is handy for displaying public holidays in the calendar, without having to enter each of the date decorations manually for each of these days.
There are two ways to link an iCalendar file to a date decoration:
-
Import from URL: Click “Import from URL”, enter the URL of the iCalendar file and click “OK”. The URL of the file will appear, together with the date and time when the link was last updated in Yesplan. The link isn’t updated automatically: an administrator can refresh the link manually by clicking “Refresh”. However, dates in the past won’t be updated when you click “Refresh”.
-
Upload File: Click “Upload File”, then “Browse…” to look for the file on your computer. If the file is processed correctly, you’ll see the date and time when the file was uploaded. If desired, you can download the file later (by clicking “Download”).
You can undo a link with an iCalendar file. Click “Edit” next to the URL of the file to do this. Then choose “Delete iCalendar (and all its date decorations)” and the link will be deleted along with the date decorations of all dates that were in the iCalendar file. Alternatively, if you choose “Delete iCalendar, but leave past date decorations”, only date decorations in the future will be deleted.
-